Game Boy Pro sound mods
The stock GB comes with both a headphone mini-jack and a small speaker. This is fine for playing games. However when it comes to recording audio from the headphone output, the signal is actually weak and noisy. GB musician/hacker Trash80 is credited to have been the first to publish a modification where the audio is directly taken at the line source, before the headphone amplification. This much cleaner signal is then redirected to an external connection (mini-jack, jack, RCA, etc). This is what is called a Pro Sound mod :)
Just like for many other mods, there is not one way to do things, the main parameters you can play with are:
- Taking the line source before or after the volume pot:
- Before/pre-pot: You get the signal almost straight from the chip, it can hardly be better. However you have no control over the amplitude, but that's fine if you intend to use the GB line out straight into a mixer/amp for instance.
- After/post-pot: The signal goes through a small pot, which is the volume pot of the GB. The volume pot is not of high quality so the signal can suffer a bit from that. In practice, this seems to vary greatly from one GB to another. On some there will be a noticeable improvement, on others it will be hardly noticeable. Check this thread for a discussion about that. The obvious advantage (or disadvantage) is that the amplitude is now controlled via the GB volume knob.
- Reuse the headphone mini-jack or add a new connector:
- Re-use headphone jack: The advantage is that it's the least intrusive way and the quickest way to have Pro Sound. You just bypass the headphone internal amp by disconnecting the headphone jack from the amp and connect it to either pre- or post-pot connections of the audio line. It also has the benefit to keep your GB shell intact. On the other hand, you effectively loose an headphone mini-jack by turning it into a line out mini-jack. So if you want to use your headphones again, you will need a small external headphone amp.
- Add a new connector: The main advantage is that by making a dedicated connector for the line out, you don't need to touch to the headphone mini-jack or speaker. However this comes at the expense of modifying the shell, ie making holes, to mount the connectors. Some people like to have an extra mini-jack line out on the side, others prefer to have more sturdy but much larger/intrusive RCA connectors.
We will not show all the possible variations, but to get an idea of the different options at hand, we will document the following:
- post-pot headphone mini-jack mod
- pre-pot RCA mod
Post-pot headphone mini-jack mod
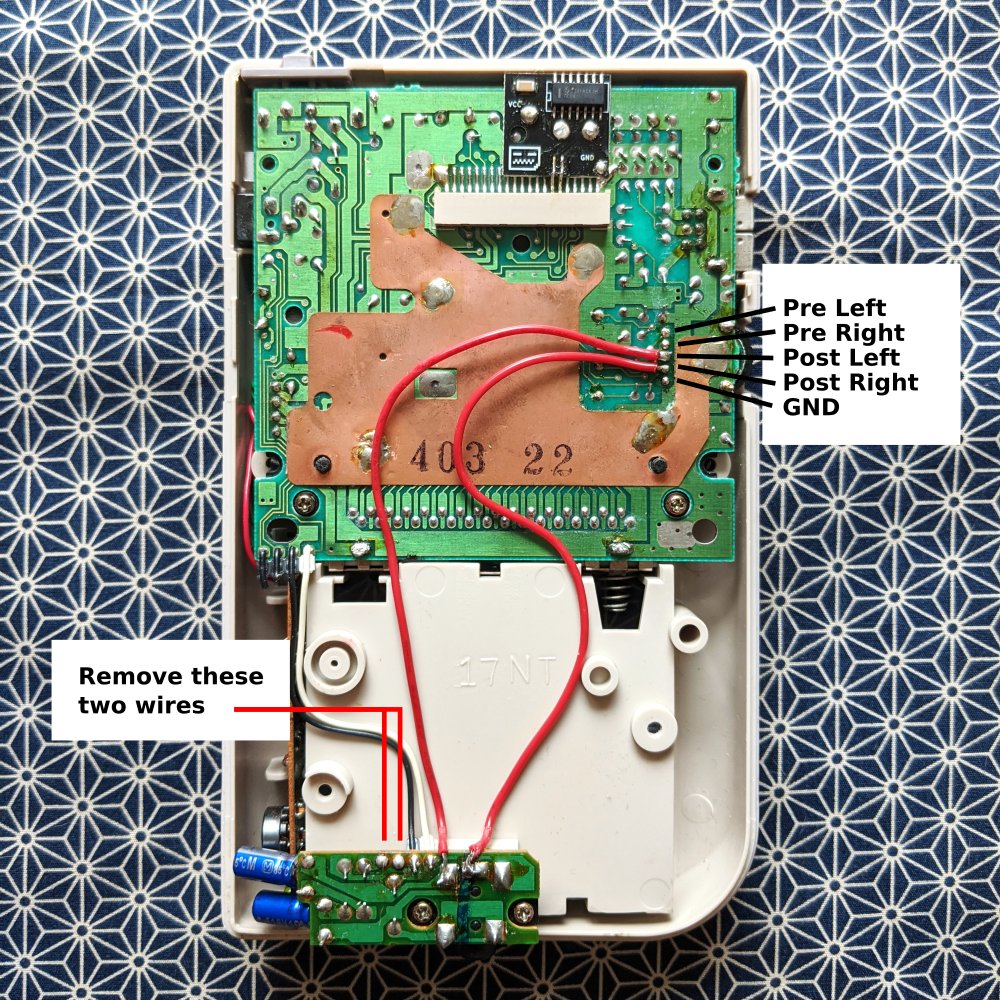
In this mod, the sound signal will pass through the pot first, then to the mini-jack. Please follow the picture on the right to make the necessary connection. If you wish to go with the Pre-pot option, simply connect the wires to the soldering points above what's shown in the picture.
You would also need to discount two wires that carries the sound signal to the sound chip, you can simply cut them off, matching what's shown on the picture.
One thing to take care when making connections is that, when putting the Game Boy back together, these wires will be pressed together between the PCBs. So, the thicker the wires, the tighter it might be when you trying to put everything back. You can use thinner wires, or use a longer wire and make a clean route between the soldering points, so that they won't be sandwiched when the Game Boy is closed.
Since we are essentially by passing the sound amplification board to gain a cleaner signal, a more advance version of this mod would be to remove the amp board entirely. By doing so, you can gain more internal space for adding components for other mods. You can also replace the jack connector with a high quality one too. Tho if you like to try this, you will also need to take care of the "switch normal" (the white wire), so that the sound can be switched between the internal speaker and the stereo jack.
Please note that the pro sound mod shown here does not connect the ground between the main board and the amp board, you may like to ground it and see what difference it can make.
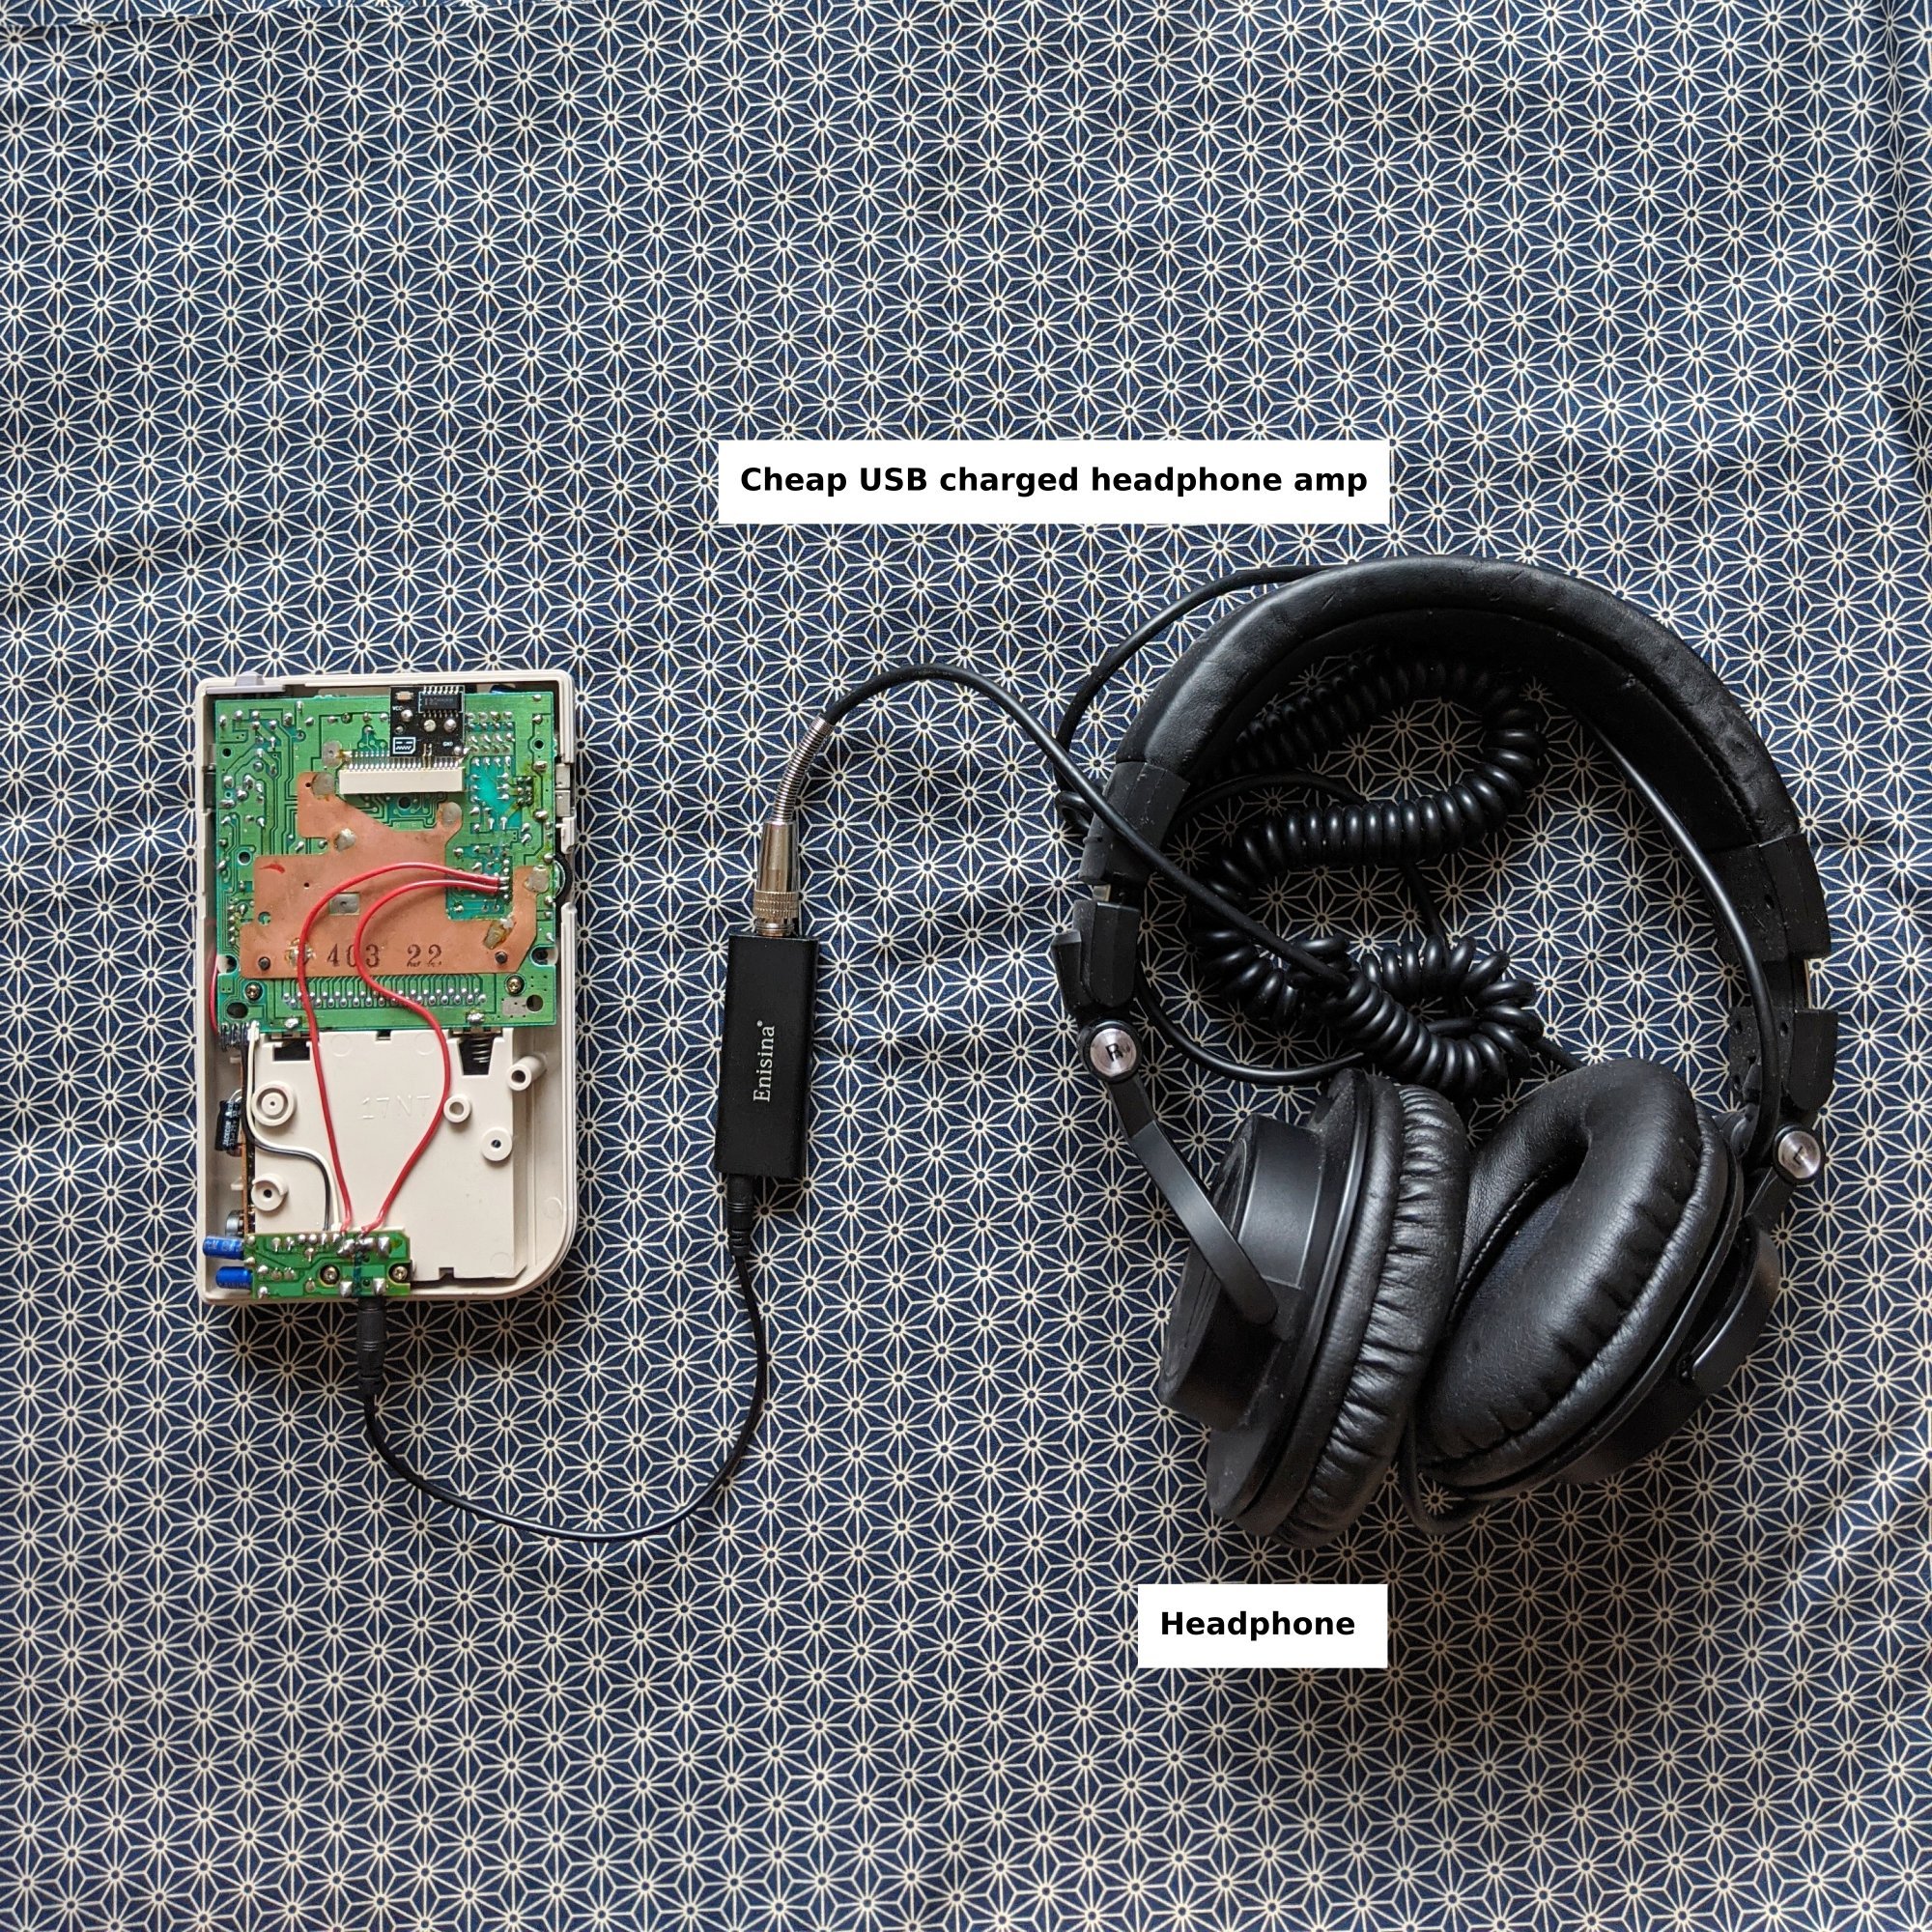
The downside of this mod is the signal becomes too quiet for normal listening with the headphone. One workaround would be to get a cheap headphone amp, which will give the signal plenty of boost for most use cases. See the picture for the setup.
Also, did we mention there is a separate mod to use a louder internal speaker for the Game Boy?
Pre-pot RCA mod
In this variation we need to be a bit destructive, but we do gain a dedicated line out with sturdy connectors which can be useful for gigs :) Also, the headphone functionality is completely unchanged which is makes the GB still useful to work/play on the go with headphones, or to preview tunes with the speaker.
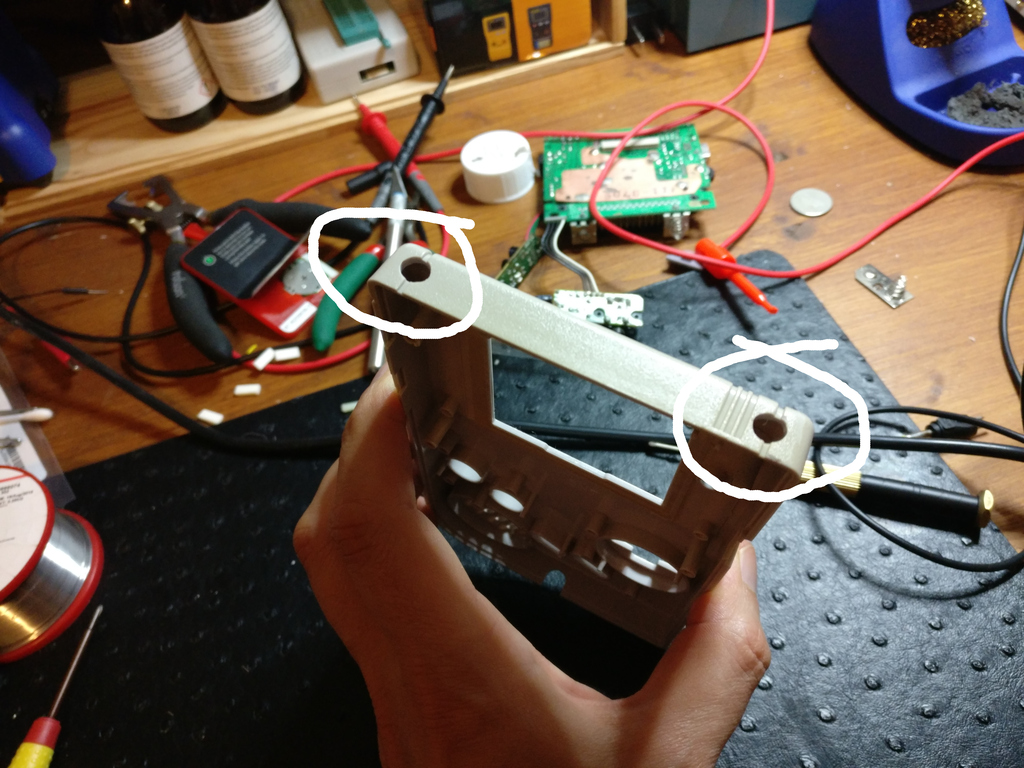
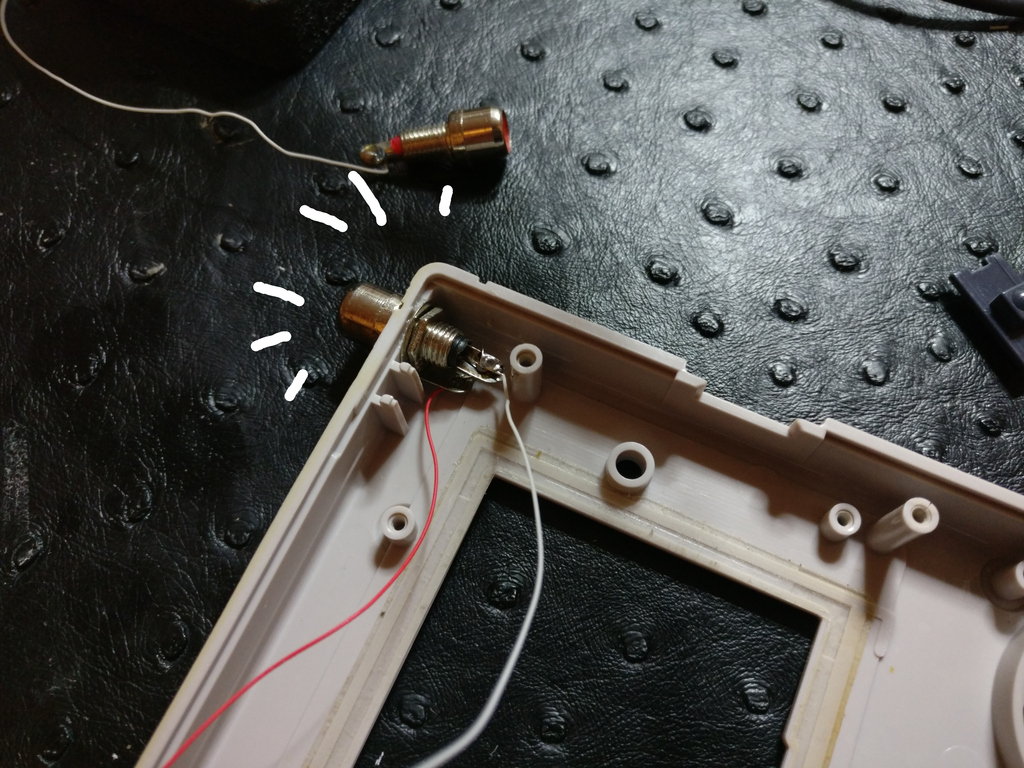
- First make hole in the top front shell of the GB. Of course you need to adjust the size of the holes depending on the size of your connectors! You don't have to put them there, this is really up to you where you want to place them. Just make there is enough space so that the PCB still fit!
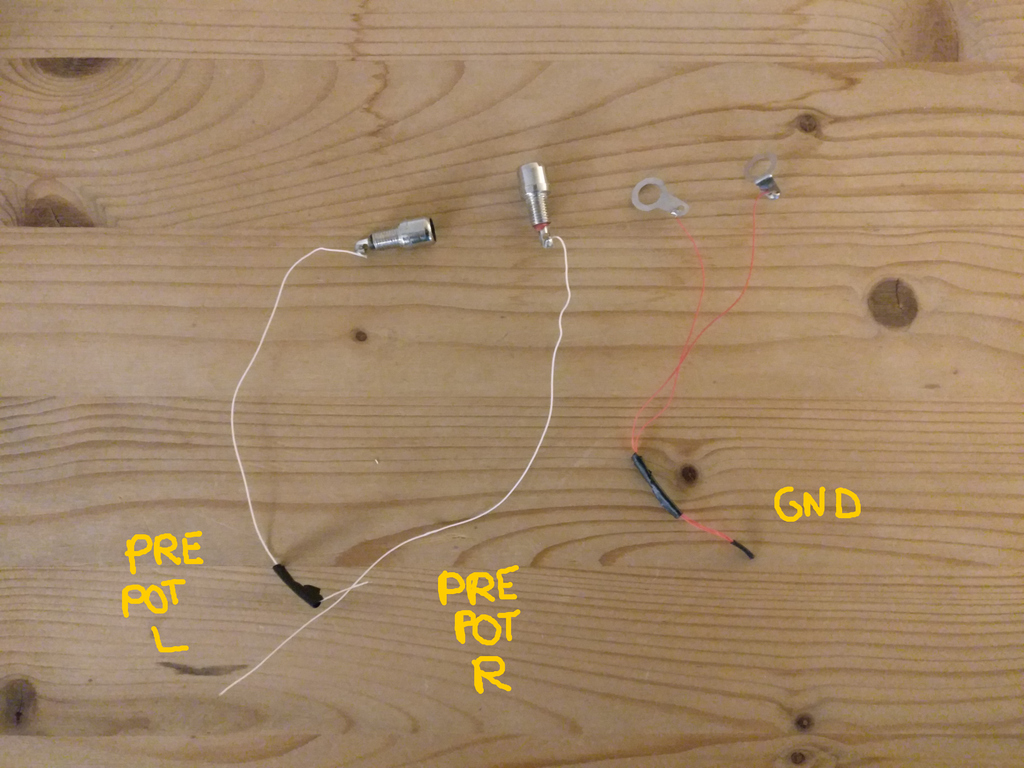
- Prepare the wires for the connectors. The notes below refers to the soldering points mentioned in the previous section. This is where you will have to solder these. Note: On the pic below, white should be red and red should be white. It does not matter of course, but usually it's the other way around...
- Now it's time to put the connectors back
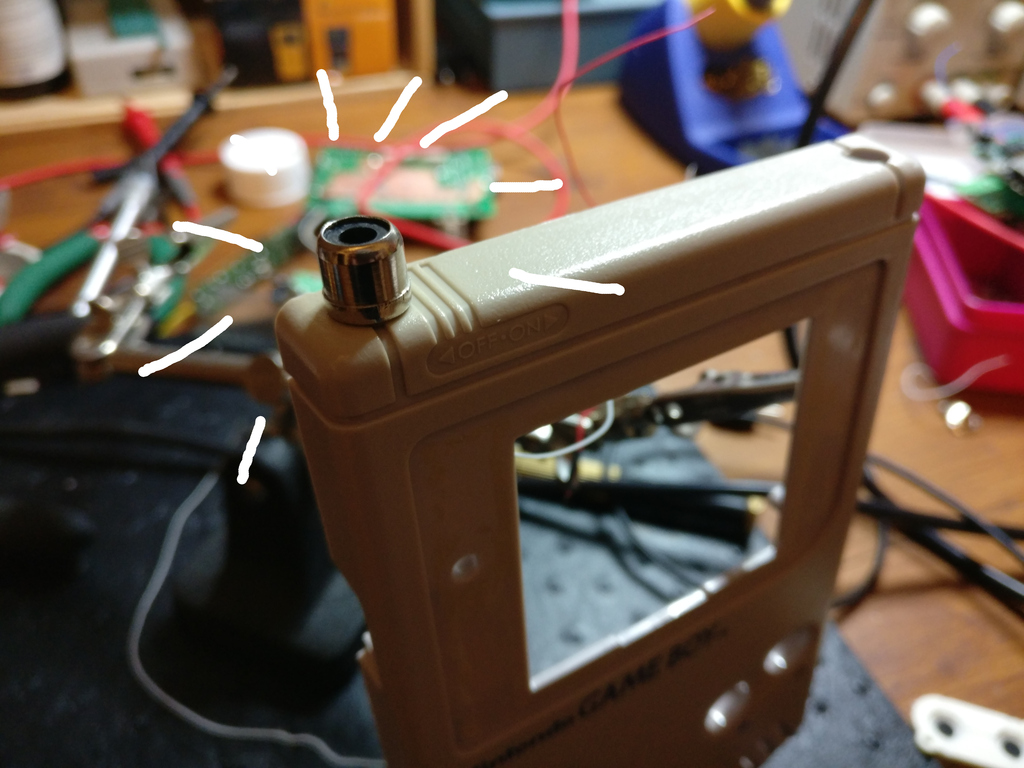
- An RCA plug that looks glorious! Proceed with the second one and then you can solder the wires referring to the notes and solder points above. make sure the wires are long enough so that you can still open the GB easily. If you have time/interest you could improve this variation with a small internal plug/connector for the wires so that you can detach the wires easily if you intend to take apart the GB often.
