Amiga Notes

Some notes while learning about the Amiga, may break into proper pages later...
Target Machine
The point is to emulate an Amiga 1200 with realistic (ie cheap) upgrades, in the optic of moving away from emulation at some point. So fs-uae-launcher needs to have a profile with the following:
- Amiga Model: A1200 with 3.1 ROM (standard with recent model)
- Hard Drives: Pick a folder, the standard parent directory in
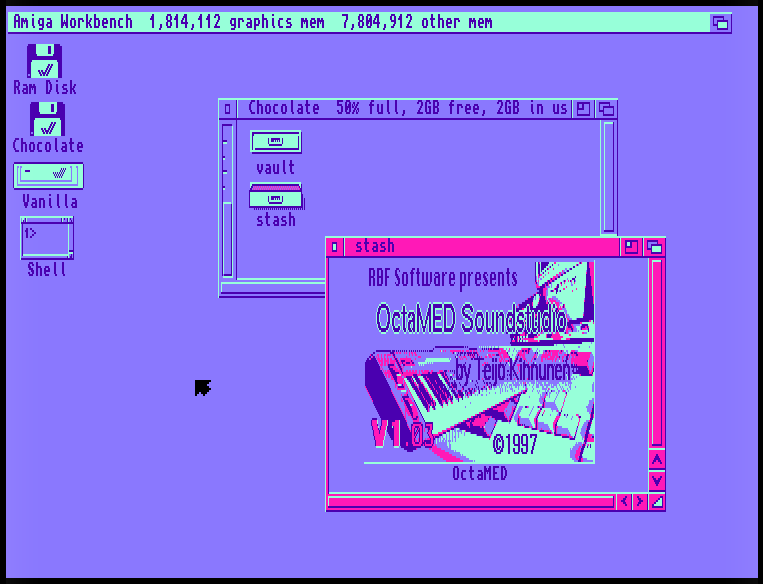
~/FS-UAE/Hard Drivesis fine (HD are standard in stock A1200?). I made 2 subfoldersVanilla(for Workbench install) andChocolate(for collection of software and files). - Kickstart ROM: Custom,
kick.a1200.46.143(comes from Workbench 3.1.4 distro) - Chip RAM: 2MB (standard)
- Fast RAM: 8MB (optional, these are relatively cheap)
- CPU: 68EC020 (standard)
- MIDI support: add
serial_port = /dev/snd/midiC1D0in the Advanced tab of the Settings menu. Adjust to your sound card.
Extra:
- Floppy Drive Speed: Turbo, because emulating slow drive access is a bit pointless here
- Floppy Drive Sound Emulation: Set to 0 (disabled) because...
- Video Settings: There is little value to do proper emulation of scale, pixel ratio, etc, for Workbench use, so I picked Integer Scaling, Square Pixels, Hide Bezel and Full Frame.
Workbench/AmigaOS 3.1.4
Workbench is the file manager of AmigaOS, the operating system of the Amiga. The last version is 3.1.4 released in 2018.
Installation
- Purchase, or find a way to get the disks (you need the Kickstart ROM anyway, there is one single for emu use and 2 files for flashing on real hardware). Make sure you add all the floppies in the swap list of the emu.
- Boot from floppy
Install3_1_4.adf - Open
Install3.1.4from Workbench, and start Install (choose fav language) - Installation is straightforward, I picked "Expert User" to only install the ps printer driver and the American keyboard mapping
- As requested, swap disks during the install (press F12 to do that)
- When finished, you can eject the last inserted disk and reboot, done
Making use of Workbench
Best is to watch the following:
- A Beginners Guide to the Amiga Workbench https://www.youtube.com/watch?v=mjBU3y4IHTM
Note: On fs_uae The left and right Amiga keys are the left and right SUPER (aka Windows) keys.
Installing software
Command line software is usually installed to be available system wide, while GUI software can run from their own media (CD-ROM, Floppy), or can be executed from any folder on the HD. Some software comes with an Installer script, some don't. If your software comes with an install script, then usually you just have to double-click on it (granted you have Installer already installed, see below).
Let's make a vault directory to keep all the stuff we're going to be hoarding, in the Chocolate HD. See HD config above. We also make a run folder for the applications we install manually.
- From host
cd ~/FS-UAE/Hard\ Drives/Chocolate
mkdir vault run
System wide installs for CLI software
Example with installing the very much needed lha compression utility.
- From host,
cdto the vault and download the software
wget http://aminet.net/util/arc/lha.run
- From Workbench, start a shell, we're going to unpack the self-extracting archive of
lhato theRam Disk, and copy/rename of the binaries to theC:directory.
cd Chocolate:vault
dir
lha.run Ram:
copy lha_68020 C:lha  # we only install the binary matching our CPU
- Now you can run
lhafrom any location in the shell
Another Example with the Installer software that's needed for install scripts.
- From host,
cdto the vault and download the software
wget https://aminet.net/util/misc/Installer-43_3.lha Installer-43_3.lha
- From Workbench, start a shell, we're going to unpack the archive to the
Ram Disk, and copy theInstallerbinary to theC:directory.
cd Chocolate:vault
dir
lha x Installer-43_3.lha Ram:
copy Ram:Installer43_3/Installer C:
Custom location installs for GUI software
GUI software can generally be installed and run pretty much anywhere. Example with OctaMED Soundstudio.
- From host,
cdto the vault and download the software
wget http://aminet.net/mus/edit/OctamedSS1.03c.lha
- From Workbench, we're going to unpack the archive to the
Ram Disk
cd Chocolate:vault
dir
lha x OctamedSS1.03c.lha Ram:
- After that, you can open the
Ram Disk, and enter theSoundstudiodrawer (make sure you Window/Show/All Files) - Open also the
rundrawer - Drag the big OctaMED icon from the
Soundstudiodrawer to the therundrawer. - Done, you can double-click the icon to start OctaMED.
Note: Instead of dragging/copy you can also copy from the shell.
Adding Icons to files
The thing that's a bit confusing with WB is that a file or directory may or may not have an Icon. It's not just cosmetics, if a file or directory does not have an Icon, not only it's not visible by default in the WB windows, but it also limits some interaction (for instance configuring Default Tool is only possible if there is an Icon). If you need to make a file or directory visible by default when displayed in WB window or if you need to associate it to a specific software, then it needs to have icon metadata, which are just a bunch of extra files that will sit next to the original file. The quickest way to add an Icon, is to drag the file into IconEdit located in Prefs/Tools drawers and save.
Useful software
- XPKGuide to open
.guidefiles